
Hope you are all enjoying your weekend!
I thought I would show you a paper bag card- tutorial I made for the february edition of Ett Trykk Magazine. This is a simpel design to use if you are giving away some money, or some chocolate, teabags or whatever you like.
Her er en posekort beskrivelse som jeg laget til Ett Trykk i februar. Et enkelt design som passer fint hvis du skal gi penger i gave, eller kanskje en sjokolade eller teposer passer fint!
Here's the card:

I used some older Maja Design papers called Marika 7. Pearls are by Melissa Frances, the flower are WOC, the tags, mini doily and branch dies are Magnolia- Doohickey's , The love hanger is by Maya Road, the berries are Kort og Godt. The doily and lace are from my stash. I used a Martha Stewart punch and some beautiful shabby seam binding from the Live & Love craft store.
I colored the Magnolia image Summer flower Tilda with Distress Ink pads and marker. Colors used: skin: tattered rose, Vintage Photo, dress: scattered straw. Wings and flower: Victorian Velvet, Black sooth (shadows)
Magnolia stempelet er fargelagt med distress ink pads og markere.
slik lagde jeg kortet:
Here's how I made it:

1. What you need: a paperbag, (mine was 27,2cm x 13cm), card stock, design papers, punches and embellishments.
Du trenger en papipose i størrelse 27,2 x 13. Kartong og mønsterark i machende farger, utstanser, og pynt etter ønske.

2. Start by folding the paperbag. Keep the opening to the right and the bottom part of the bag to your left.
Begynn med å brette papirposen i to. "Flappen" som er undersiden av posen skal være vendt inn på venstre side- papirposens åpning på høyre side.

Kutt til kartong og mønstereark til alle fire sidene på posen, og en til undersiden av posen (det som skal bli lommetn). Jeg har valgt å stanse ut kanten på en side av mønsterpapiret.

4. Decorate a tag for a personal message to go in the opening of the bag. The tag should be long enough to show. A centimeter will do.
Lag en tag til å skrive en hilsen på. Lag en tag som er litt lengre enn kortsiden. Denne kan dyttes inn i papirposens åpning.
Lag en tag til å skrive en hilsen på. Lag en tag som er litt lengre enn kortsiden. Denne kan dyttes inn i papirposens åpning.

Lim på kartong og mønsterark på alle 4 sider og på lommen. Du kan gjerne sverte kantene først hvis du ønsker det.

6. Add glue on the edges of the inside of the little pocket (the bottom of the paperbag) top and bottom.
Lim langs den nederste og øverste kanten på "flappen" (det som var bunnen av papirposen) med limpistol eller lignende, slik at det blir en lomme inn hvor pengene kan plasseres.

Dekorer kortet etter eget ønske.
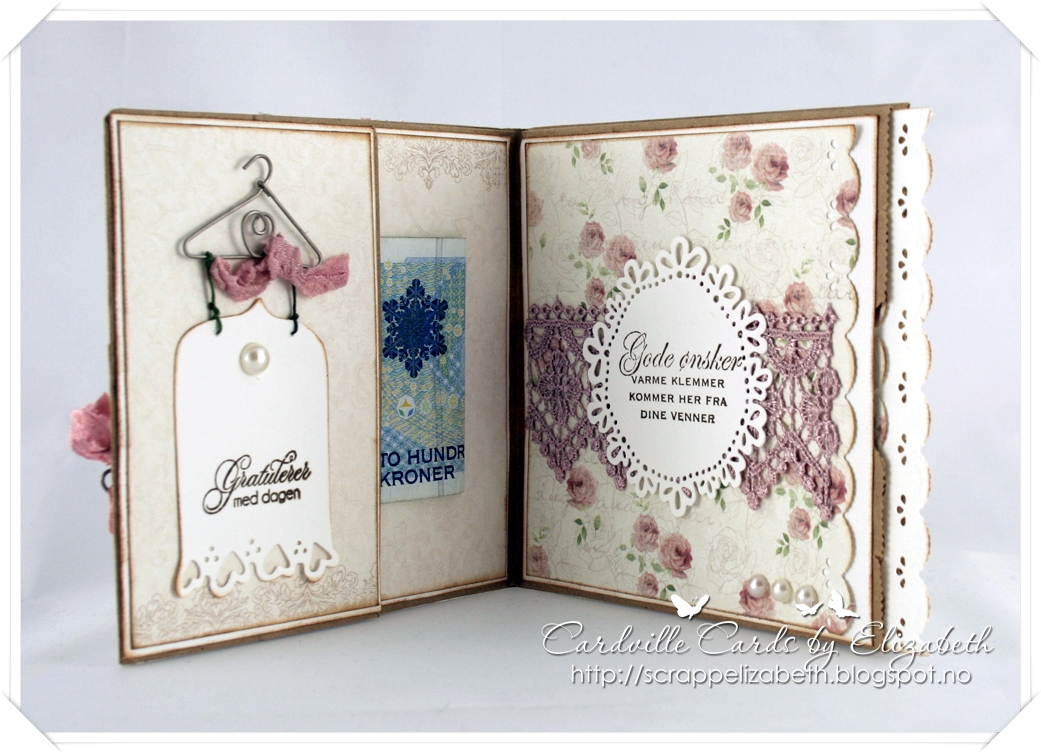
Here's the inside of the card. Sentiment stamps are by Kreativ hobby.
Her er innsiden av kortet. Stemplene er fra kreativ hobby.
Hope you'll give it a try!
Thanks for stopping by my blog today!
And thank you so much for your lovely comments!!!
Crafty hugs,
Hope you'll give it a try!
Thanks for stopping by my blog today!
And thank you so much for your lovely comments!!!
Crafty hugs,

17 kommentarer:
Wow! It's absolutely beautiful. xxx
Hi Elizabeth,
I LOVE paperbag cards, they are so much fun to make and so lovely to look at. Yours is so beautiful!! Love it! And hey, I just made a card with the same image. Will show it on my blog tomorrow :o)
Have a wonderful weekend!
Hugs, Karina
oh wow! what a great design elizabeth! you are so creative :D
Wonderful tutorial, your card is just beautiful
Hugs Julie P
Wauuuu
gorgeous,
thanks for tutorial,
hugs Tamara P.
This is awsome Elizabeth love that idea and you have decorated your bag beautifully
Thank you for your tutorial
jacqui x
what a beautiful creation you made this week perfect and thanks for the tutorial
Wonderful tutorial. Thank you for posting it! Your paper bag card is awesome! Hugs! xx
Meget lekkert posekort!
Klem Heidi:)
This is so beautiful, Elizabeth...thanks for reminding me it's time to make one of those cards....loooove 'em!
Wow Elizabeth, another stunning creation! Absolutely gorgeous! Thanks for the tutorial. Hugs, Ivonne
Wow this is so beautiful! Thanks for the fab tutorial too :) Jen xxx
Wow! Super layout. Thanks for tutorial. I will try too. .o)
Hugs,
Jasmina
Åh helt underbart Elizabeth!!
Hoppas vi får chansen att ses snart igen.
Kram Åsa
Hi Wow this is such a great idea and such a great gift idea ..Thank you for the tutorial it looks like so much fun to make ;0)
Hi Wow this is such a great idea and such a great gift idea ..Thank you for the tutorial it looks like so much fun to make ;0)
super cute dear Elizabeth.
love the romantic old fashioned look
hugs
Claudia
Legg inn en kommentar